Before the summer I showed you how to build a Slack bot using Claudia - it’s a very simple ping command that you could run from a Slack-client. However that implementation had a flaw; if the command takes more than 3 seconds to complete it fails.
This has to do with a restriction in Slack that doesn’t allow requests to take more than 3 seconds. In my mind created a super complex and beautiful solution including me handing a message of to a queue and that I then polled and called back to… I ran out of time figuring out.
Which turned out to be a great thing, since the Claudia team not only created a new beautiful site https://claudiajs.com/ but also wrote a tutorial on this exact topic
In this post I will re-implement pingu using a delayed response as in that tutorial.
Getting started
The easiest way to get started is to clone my repo and start from the 1.1 tag.
git clone https://github.com/marcusoftnet/pingu.git && cd pingu && git checkout tags/1.1
Also, we will use the 1.6.0 version of Claudia for this so be sure to update your installation:
npm install claudia -g
or
npm upgrade claudia -g
You can, of course go through my previous blog post to reach this point too.
Now, we are ready to install the dependencies: npm install and, if you haven’t done that you can create the service with npm run create. Make sure to check the package.json so that the settings for the create script matches your region etc.
Configuring a Slack command
Oh, you need to configure a Slack command too. Read this - it’s easy.
Where are we?
I’ve worked a little bit with the code from the blog post so that it’s now a command like this: /pingu [url1, url2] that accept one or more urls (separated with commas) and returns a nicely formatted (ah, well…) response.
We need to tweak this a bit so that we first return a simple acknowledgement and after awhile a list of answers.
Responding to the first request
Just returning the response is simple, of course, but we are going to do one more thing; trigger a request to … we actually ourselves…
The trick here (made simple with the later versions of claudia-bot-builder) is to do a call back to ourselves. For the first request we just return a confirmation and then fire the second request that will do the delayed response once all the pinging is done. To call ourselves we will use the aws-sdk package, which is a package from the AWS team.
Here’s the code to do that - I’m using the tutorial as a template;
const botBuilder = require('claudia-bot-builder');
const aws = require('aws-sdk');
const lambda = new aws.Lambda();
const slackDelayedReply = botBuilder.slackDelayedReply;
const api = botBuilder((message, apiRequest) => {
return new Promise(
(resolve, reject) => {
lambda.invoke(
lambdaInvocationParams(apiRequest, message),
(err, done) => {
if (err) return reject(err);
resolve(done);
}
);
})
.then(() => {
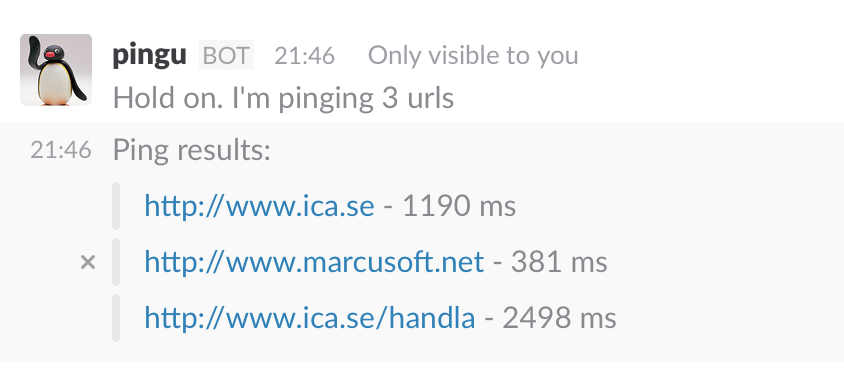
const noOfUrls = urlsFromSlackMessage(message).length;
return { text: `Hold on. I'm pinging ${noOfUrls} urls` }
})
.catch((ex) => {
return `Ok, something went seriously wrong...\n ${ex.message}`
});
});
module.exports = api;
function lambdaInvocationParams(apiRequest, originalSlackMessage) {
return {
FunctionName: apiRequest.lambdaContext.functionName,
Qualifier: apiRequest.lambdaContext.functionVersion,
InvocationType: 'Event',
Payload: JSON.stringify({ slackEvent: originalSlackMessage })
};
}
function urlsFromSlackMessage(message){
return message.text.split(',');
};
Oh, dear Lord. Those big promise-objects scares me… but it’s not that hard really. It’s just compact. Let’s walk through it from the bottom up:
- The final
catch-block is just the response that we will return for exceptions - Moving a bit up we have the
thenblock that constructs the initial response, to simply acknowledge that we got the message and will come back soon. Promise…. Hey! Just like a promise in fact.
The main part is of course the big Promise that covers most of the function. It does two things basically;
- It calls ourself by using the lambda functionality of the
aws-sdk. See theconst lambda = new aws.Lambda();and later we are calling the lambda withlambda.invoke- This is accomplished by pulling out the name, qualifier etc. by using the
apiRequestobject thatclaudia-bot-builderpass into our main function. That request object contains some context information found in thelambdaContext. For example the function name is retrieved like this:apiRequest.lambdaContext.functionName - We also set up some more data, like the
InvocationTypeand thePayloadthat is the data we will receive in the second function. We will simply just pass everything we got as parameter from slack (messageparameter to the main function) This will become useful when we handle the call back to ourself later. - I’ve pushed all of this fiddling around into a function called
lambdaInvocationParams
- This is accomplished by pulling out the name, qualifier etc. by using the
- The second parameter, to our
lambda.invokecall, is some error handling that basically will make sure that we end up in the.catchpart of the Promise, by rejecting or by resolving the promise.
Phew! That’s a mouthful.
And it’s not over yet.
Responding to the second call
Because that simply just returns an acknowledgement and calls ourselves - now we need to respond to that second call, our “self invocation” if you like.
Here’s the code to do that:
const botBuilder = require('claudia-bot-builder');
const co = require('co');
const coreq = require('co-request');
const each = require('co-each');
const slackDelayedReply = botBuilder.slackDelayedReply;

api.intercept((event) => {
  return co(function *() {
    if (!event.slackEvent) return event;

    const message = event.slackEvent; //original slack message sent to bot
    const urls = urlsFromSlackMessage(message);

    var pingResults = yield each(urls, pingUrl);
    var attachments = yield each(pingResults, pingResultToSlackAttachment);

    return slackDelayedReply(message, {
      response_type: "ephemeral",
      text: `Ping results:`,
      attachments: attachments
    })
    .then(() => false); // prevents normal execution
  });
});

module.exports = api;

function urlsFromSlackMessage(message){
  return message.text.split(',');
};

function pingResultToSlackAttachment(url){
  return { text : url };
};

function pingUrl(url) {
    return co(function*() {
      const start = new Date();
      const result = yield coreq(url);
      const end = new Date() - start;

      return `${url} - ${end} ms`;
    })
    .catch(function(err) {
      return `Could not ping ${url} - '${err.message}'`;
    });
};
Ok, this is a bit longer, but also easier to read, in my humble opinion.
We are utilizing a feature from claudia-bot-builder in api.intercept. This is a way to catch our requests before they reach the normal routing in our application. By doing that we can inspect the event-payload that we attached as Payload in the initial request.
We simply check if the .slackEvent property is present ( if (!event.slackEvent) return event;). If not we hand it back to the normal flow.
If it is present we can start the real job; pinging the urls in the message. For this I’m using co-request which allows me to use yield and write my asynchronous code, so it looks synchronous and readable.
I’m also using a very functional-ly package called co-each, that works a bit like the map function found in many functional languages; take an array of objects and call a method for each element.
The actual pinging is done in the pingUrl method, that also measures the time take for each request.
I’m formatting the answers as Slack message attachments, which looks nicer.
Finally we are using the slackDelayedReply that responds back to the original message we got from Slack. That method (slackDelayedReply) is another short-cut that Claudia-bot-builder gives us.
Installation
Ok - the final part is to use Claudia to push the whole thing to AWS. Here’s my command, in a package.json script, to accomplish that:
"scripts": {
    "create": "claudia create --api-module bot --region us-east-1 --timeout 120 --allow-recursion --configure-slack-slash-command"
  }
Here’s the moving parts described:
api-modulepoints to the entry point of our application, in our case thebot.jsfile that exports the apiregionis simply the region where you want publish your lambdatimeoutis increased for any eventual long running pinging. 120 seconds should be enoughallow-recursionis paramount since we need this setting to do the callback to ourselves, that our entire solution builds uponconfigure-slack-slash-commandsets our lambda up with the necessary configuration to make it a slack command. This will trigger a little wizard where you can enter the keys from your Slack command. You’ll find them at this site
Should you already have a deployed version of the bot you can add any additional configurations using the claudia update command. For example claudia update —allow-recursion or claudia update --timeout 120
Conclusion
Hey - it works! No complicated (although wonderful) message queue and complex but rather everything is done in a single small file that fits in my head.
We have a created a small little bot that now can receive a comma separated list of url in Slack and that pings them all. For example try this: /pingu http://www.aptitud.se, https://www.marcusoft.net, http://www.google.com
I hope you found this useful. I learned a lot writing this.
My code is here